How Are CBD Vape Carts Made? A DIY Guide
Making your own cannabis vape carts may seem impossible. Agreed. It’s a multi-step process requiring high-quality ingredients and precision to get pure cannabis products.
But certainly not impossible. If you can easily make CBD capsules, you can DIY this, too.
We will walk you through how CBD vape carts go from raw materials to the finished cartridge, ready to provide relief and relaxation.
It’s a complex process, but the result is a simple cartridge to deliver CBD benefits with a button. Besides, you’ll be sure your cart contains only Health Canada-approved content. You don’t have to worry about vitamin E acetate, heavy metals, or pesticides.
Let’s dive in.
Extracting CBD From Hemp Plants
The first step to making a CBD vape cartridge is extracting CBD from hemp plants. The most common are CO2 extraction and solvent extraction.
For CO2 extraction, pressurized carbon dioxide is used as a solvent to separate CBD oil from cannabis plant material. This extraction process requires expensive equipment but is considered safe since CO2 is non-toxic. The result is a concentrated cannabis extract free from harsh chemicals.
In solvent extraction, solvents like ethanol, butane, or propane strip the CBD from the plant. The solvent is then evaporated, leaving behind nearly pure cannabis oil. This extraction method is cheaper but risks residual solvents contaminating the final product if not done correctly. For vape cartridges, all solvents must be entirely removed.
Whether using CO2 or solvents, the basic steps are:
- Harvest the hemp plants and dry the plant material.
- Grind the plant material into a coarse powder to increase the surface area.
- Pack the ground plant material into an extraction vessel.
- Run the solvent through the vessel, stripping the CBD and other compounds from the plant.
- Evaporate away the solvent using heat and vacuum pumps.
- Test the extract to determine CBD and THC potency and check for contaminants.
- Dilute the extract with vape-specific oils like MCT, hemp seed, or terpenes.
Winterizing and Decarboxylating the CBD Oil
To turn your CBD concentrate into vape cartridges, you’ll need to winterize and decarboxylate it. Winterizing removes fats and waxes, while decarboxylation activates the CBD and other cannabinoids.
To winterize the CBD oil, you’ll need ethanol, a centrifuge or filter, and a rotary evaporator. First, combine the CBD oil and ethanol at a 1:4 ratio. Gently heat and mix for 30 minutes. Next, centrifuge or filter out the fats and waxes. Finally, use the rotary evaporator to remove the ethanol under a vacuum.
For decarboxylation, spread the winterized oil on a baking sheet and bake at 220 F for about an hour. This converts CBDA to CBD and activates other cannabinoids. Check frequently and stir the oil around for even heating.
Adding Terpenes for Flavor (Optional)
If you want to enhance the flavor of your CBD vape cart, adding natural or artificial terpenes is an excellent option. Terpenes are organic compounds found in plants like cannabis that give them their distinctive aromas. Extracting and adding terpenes to your CBD vape liquid can create specific flavor profiles that may provide certain effects.
Choosing Your Terpenes
The cannabis terpenes you select depend on the flavor and experience you want to create. Some popular options include:
- Limonene – Has a bright citrus aroma and may provide uplifting effects. They are often used in cannabis strains.
- Pinene – Has an earthy pine aroma and may promote alertness and focus. It’s found in some Sativa strains.
- Linalool – It has a floral, lavender aroma and may provide calming, anxiety-relieving effects. Common in Indica strains.
- Myrcene – An earthy, musky aroma that may produce sedating, relaxing effects. Found in many Indica strains.
You can buy individual terpenes, or terpene blends that combine multiple terpenes to create unique flavor profiles like “OG Kush” or “Pineapple Express.”
Start with a small amount, around 1-3 drops per gram of CBD vape liquid. You can always add more, but you can’t take it out!
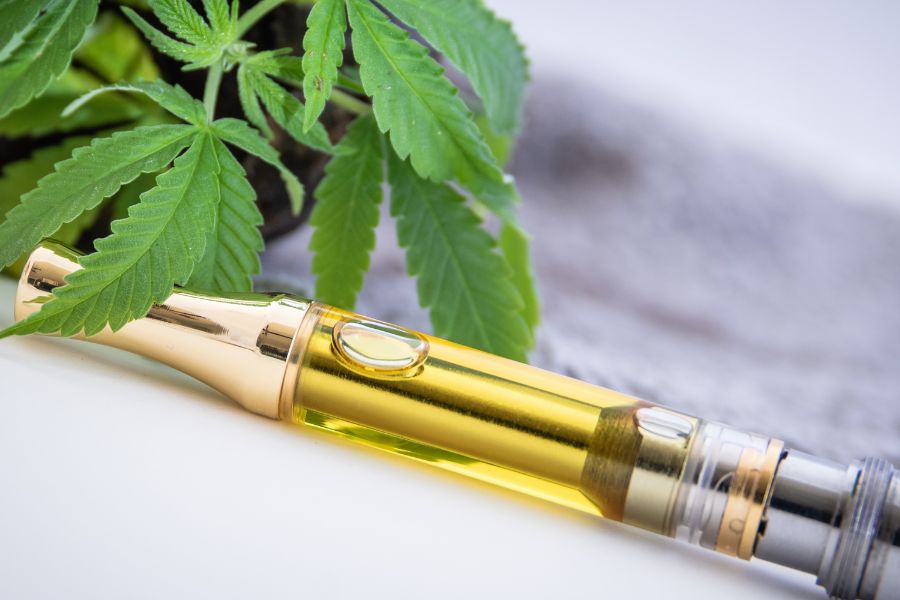
Mixing the CBD Oil With a Carrier Liquid to Produce CBD Vape Oil
To make CBD vape oil, the extracted CBD oil needs to be mixed with a carrier oil that will thin it out and allow it to work properly in a vape pen or vape mod.
The most common carrier liquids for CBD vape oil are propylene glycol, vegetable glycerin, and MCT oil.
Mixing the Ingredients
To produce CBD vape oil, combine CBD oil and a carrier liquid in a bottle or container with a lid. Start with a small amount of CBD oil, around 1 to 2 milliliters. Then add carrier liquid 1 milliliter at a time, mixing thoroughly after each addition. Mix carrier liquid until the vape oil reaches your desired potency and consistency.
For most people, a good mix is around 1 part CBD oil to 3 parts carrier liquid. So, if you start with 2 milliliters of CBD oil, add 6 milliliters of carrier liquid. This will produce a vape oil with around 25 milligrams of CBD per milliliter. You can then adjust the amounts up or down for your desired potency.
Tips for Mixing
- Shake or stir vigorously after each addition of carrier liquid to ensure even mixing.
- Test the vape oil for the right viscosity (thickness) as you go. It should be thin enough to work in your vape pen but not too watery.
- Consider using a liquid dropper or syringe to measure and add the carrier liquid carefully. This will make it easier to get the ratios right.
- Label your container with the ingredients and potency once complete. This will help you adjust amounts for future batches.
- Steep the vape oil for at least 2 to 3 days before using. This infuses the ingredients thoroughly and helps produce a smooth, flavorful vape oil.
- Store your CBD vape oil in an airtight container away from heat and light when not in use. When stored properly, vape oil can last six months to a year.
With some experimenting, you’ll make customized CBD vape oil in no time. The key is starting with high-quality CBD oil and adjusting the amounts slowly and carefully to your liking.
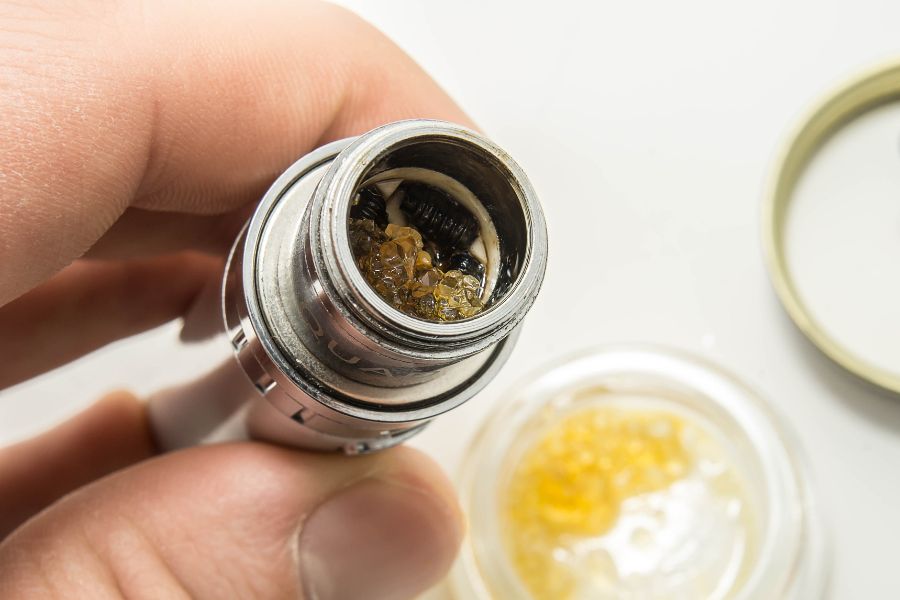
Filling and Assembling the Vape Cartridges
Fill the Cartridges
Now comes the fun part—filling your empty vape cartridges with the CBD vape oil you made. You’ll need a syringe or pipette to transfer the oil into the cartridges.
Carefully fill each cartridge with your CBD vape oil. Fill about 3/4 full to leave some air space at the top, and allow the oil to expand slightly. Secure the mouthpiece back on the cartridge, and confirm the vape battery is secure.
- Be extremely cautious not to overfill the cartridges. This can cause clogs, leaks, and other issues.
- Wipe up any spilled oil immediately to avoid mess or waste.
Test and Label Your Cartridges
Now comes the rewarding final step—testing your homemade CBD vape cartridges! Take a few test puffs of each cartridge to determine if they are working properly and vaping well. If any feel clogged or aren’t producing vapor, you may need to empty and refill them.
Final Words
As you can see, it’s a pretty straightforward process if you have high-quality ingredients and the proper equipment.
The key is using organic hemp, extracting the CBD carefully, then diluting and flavoring it adequately based on the intended potency.
While the steps are simple, making great CBD vape carts is an art form. The companies that do it best focus on purity, potency, and taste. If you want the best experience, research to find reputable brands that use the highest quality ingredients and extraction methods.